PROJECT NOTES
Introduction
Project Notes is an application module in Proteus for adding documentation or written content to the project. It is a free-form editor so you can add whatever you like in whatever style you want. This may be as simple as scribbling a TBD list at the end of the working day or as formal as an approved revision history for the project. Project Notes are stored inside the main Proteus file (*.PDSPRJ) but can be printed separately or exported to PDF. They can also be appended to the end of the BOM PDF report or included inside the CADCAM ZIP file.
The Template system in Project Notes allows you to create, save and re-use formatted content and we have included some example templates for common report types that might prove useful.
In keeping with the other modules in Proteus, you can use Project Notes to interact with the rest of the system. For example, you can link text to real parts on the schematic or layout so that clicking on the link will navigate to the part in your design or PCB. You can also use fieldcodes to bring in design information such as Author or Revision Number and the internal clipboard makes it easy to copy and paste pictures from other Proteus modules into Project Notes.
Project Notes is the generic documentation center for your projects and we expect it will find many useful roles for different users.
Guided Tour
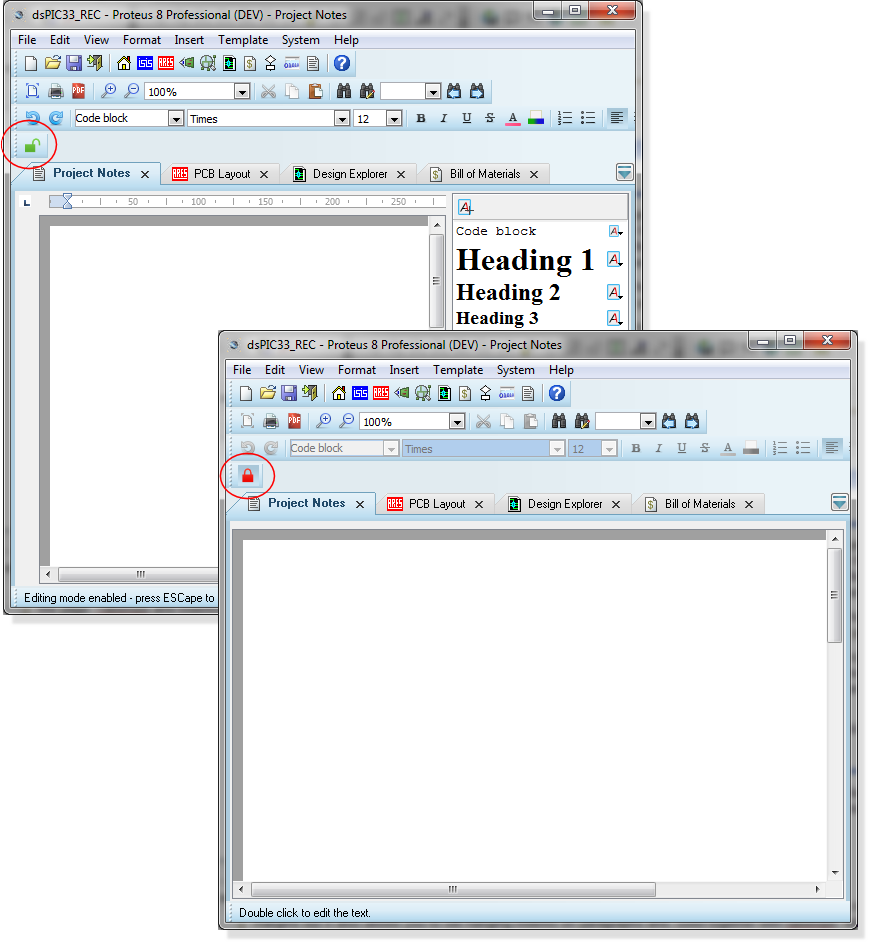
Project Notes is a general purpose editor and as such most of it's iconography and features will be familiar to anyone who has used MS Word. There are two views of the application module, depending on whether it is locked (read-only) or unlocked (editable).
Ruler
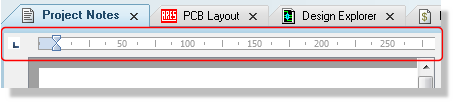
The ruler at the top is visible only when the document is unlocked/editable. At it's simplest it allows you to control the left and right margins but it also allows you to set hanging indents on paragraphs and, used together with tabstops, will allow you position content on the page. Tabstops and indents work in the same way in Project Notes as in MS Word and other word processing apps.
Main Toolbar
The main toolbar across the top provides easy access to most of the common operations you need when typing up a document. Most of the controls on this toolbar are disabled in read-only mode.
Page Setup and Output
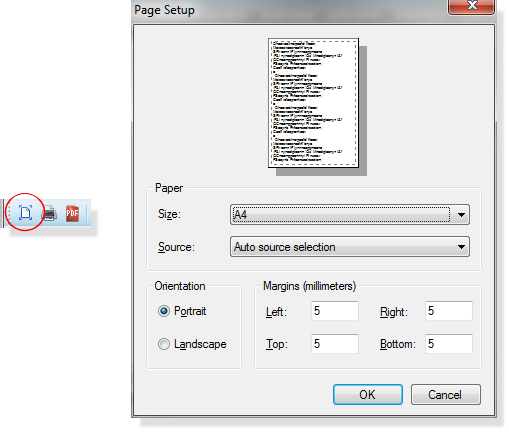
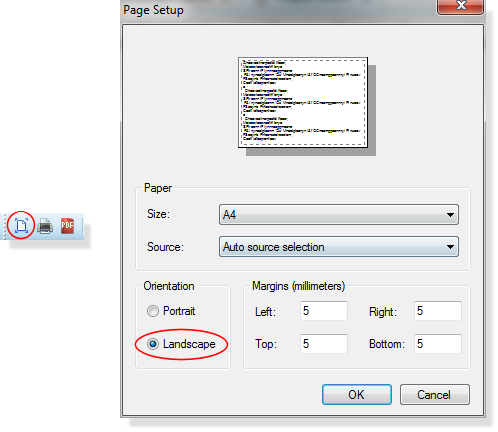
Provides access to page setup (paper size and orientation) as well as print and PDF output options.
Keyboard:
CTRL+P : Print.
Magnification

Allows you to view the document at various zoom levels.
Keyboard:
CTRL+MiddleMouseWheel : Zoom in and out.
Clipboard

Cut, Copy and Paste commands for manipulating content.
Keyboard:
CTRL+X : Cut to clipboard.
CTRL+C : Copy to clipboard.
CTRL+V : Paste from clipboard.
Find and Replace

Search the document for content and/or replace with different content.
Keyboard:
CTRL+F : Find dialogue.
CTRL+H : Find/Replace Dialogue.
CTRL+F3 : Find Previous.
F3 : Find Next.
Undo/Redo

Undo or Redo the previous operation.
Keyboard:
CTRL+Z : Undo.
CTRL+Y : Redo.
Inline Styling and Decoration

Adjust font and decorations locally to the text being entered or the selected text. Also enables lists (bullets and numbers) and basic paragraph positioning (left, center, right, full).
Keyboard:
CTRL+B : Bold.
CTRL+U : Underline.
CTRL+I : Italic.
See Also:
Insert Object

Insert other content to the document. Options exist for images, page break, links, bookmarks and fieldcodes.
Keyboard:
CTRL+D : Bookmarks Dialogue.
CTRL+K : Links Dialogue.
Locked Status

Displays the current status of the document (locked or unlocked). Click to toggle.
See Also:
Styling Control Panel
The styling control panel is visible only when the document is unlocked and appears as a column on the right hand side of the document. For each style, the title of the style is shown with the specified font and decorations and a button at the right hand side allows you to edit the style.
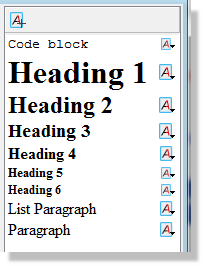
New styles can be created either from the button at the top of the control panel or by the right hand context menu.
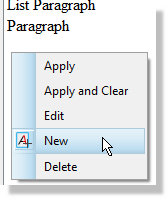
During document entry the style currently in use will be highlighted. Double clicking on another style will apply that style to the current paragraph.
Keyboard:
CTRL+1,2,3,4,5,6 : Heading 1,2,3,4,5,6.
CTRL+SHIFT+N : Normal Style (Paragraph)
Creating Content
Creating content in a project is basically a three stage process:
1) Load a template.
2) Configure Styles.
3) Start Writing!
Loading a Template
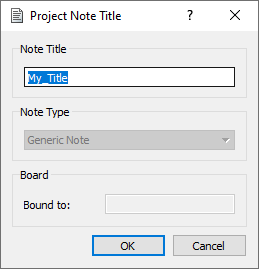
When you open the Project Notes module for the first time in a Project you will be presented with the template selection dialogue form. You can initialise the notes from one of the pre-existing templates if that suits your purpose or select default for a blank document.
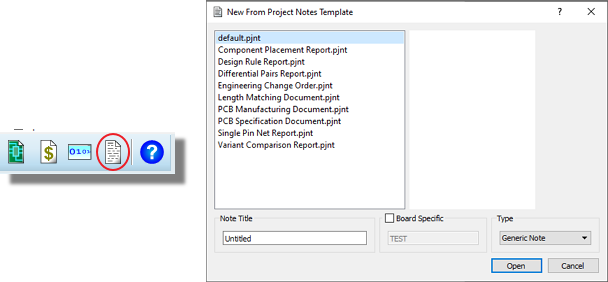
Set the title for the document and it's type.
If you are using the default template and you need a specific page size or layout (e.g landscape) then it's best to set this up before you start writing the document.
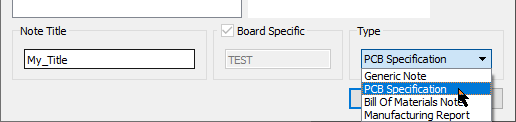
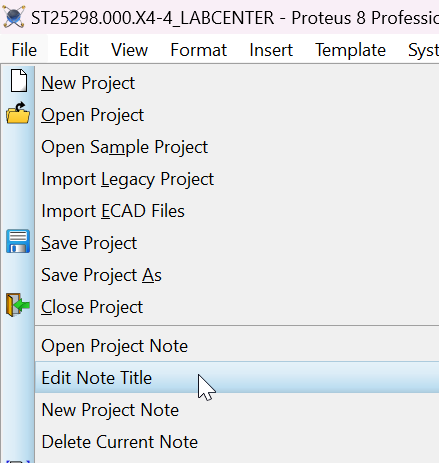
If you want to change the title or type of the document then edit via the 'Note Title' command on the File menu.
See Also:
After the first launch of Project Notes in a project, it will open by default in read-only mode. You can then either double click to edit or click on the padlock on the top toolbar to open.
See Also:
Configuring Styles
Once open and editable, the first task is to set up the various styles that you will use. The styles are all displayed with a live preview at the right hand side and can be edited from the context menu.
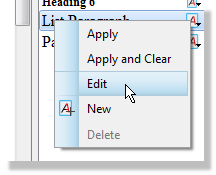
The style dialogue then lets you set up font and decoration, margin and spacing and borders and background.
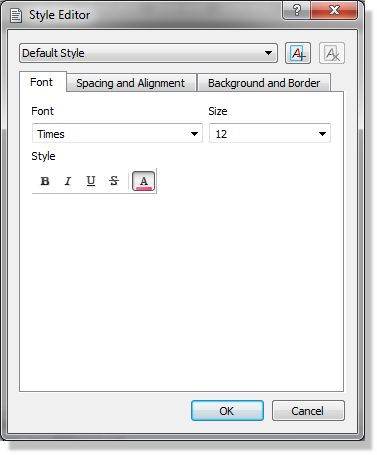
When you change a style it affects all text using that style so a little discipline with styles at the beginning makes changes later on much faster.
See Also:
Writing the Document
Writing a document should be familiar to everyone and Project Notes works in largely the same way as any other word processing application.
Select the style you want to use (heading, paragraph, etc.) and start typing. Content such as images and links can be added from the Insert Menu and local changes to font or decorations can be made via the main toolbar. Double click on a style in the control panel or use the keyboard shortcuts to change the styling of the current paragraph.
Closing the project notes tab is the same as closing any other tab in Proteus in that you can close and open the tab during a Proteus session without loss of data. However, the data is not filed until you save the Project (File Menu).
See Also:
Types of Project Note
There are three types of Project note, namely Manufacturing notes, Bill of Materials notes and Generic notes.
- Manufacturing Notes: Notes for the fab house and can be included with CADCAM output. Only one per project.
- Specification Report: Fabrication notes and guidelines - can be included with CADCAM output. Only one per project.
- Bill of Materials Notes: Notes for the BOM Report and can be appended to the PDF output of the Bill of Materials. Only one per project.
- Generic Notes: Any other notes. Can be anything you like (revision history, TBD list, testing schedule, etc.). You can have as many as needed in a project and we've created some templates for things like Variant Comparison Reports and Design Rule Reports for you.
The type of project notes document is shown on the initialisation dialogue.
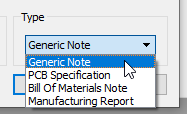
You can change the Title and type of a project notes document via the Note Title command on the File Menu
See Also:
Multiple Project Notes
You can have as many generic project notes documents as needed for a project, as well as one of type Manufacturing and one of type Bill of Materials.
You can only have one Project Notes document open at any time and you navigate between documents via the Open Project Notes command on the File Menu. Commands for creating new Project Notes or deleting existing documents from the project are also on this menu.

These commands will be enabled when the current document is opened for editing.
Output Options
Project Notes can be printed or exported to PDF from the icons on the toolbar or from the File menu commands.
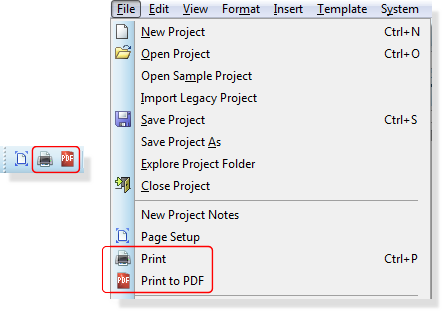
If you have a Project Notes of type Bill of Materials then you can also append the content to the Bill of Materials PDF report. This is useful if you want to provide detailed purchasing information.

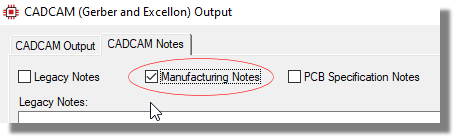
Finally, if you have created Project Notes of type Manufacturing Notes then you can include them with the CADCAM output fileset. This is useful if you want to provide specific instructions, screenshots or PCB specifications to the manufacturer. It appears in the same directory or the zip file as 'Manufacturing notes.pdf'
Protecting Project Notes
Once project notes is in use it will open by default in locked / read only mode.
- When in read-only mode you can unlock the document either by clicking on the padlock icon on the toolbar or by double clicking in the main editing area.
- When in editing mode you can toggle back to read-only mode via either the ESCAPE key or toggling the padlock icon on the toolbar.
When unlocked, you can set a password for the document via the Set Lock Password command in the File Menu.
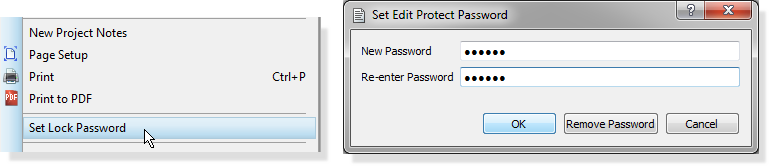
If a password is set it will apply to all Project Notes documents in the current project and will need to be entered each time you want to edit any of the documents.
You can remove a set password via the same dialogue form when in editing mode.
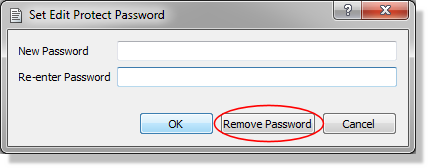
Document protection is meant as a first level defense against accidental editing. It is not designed as a significant security feature and shouldn't be relied on for that purpose.
Labcenter should be able to retrieve/unlock documents on request should passwords be forgotten or lost.